These are the slides along with some comments from a presentation I gave lately in the bbv .Net System boot camp – the yearly education week of my division in my company.
Once upon a time, Agile Software development came to our software development country.
Like a monster, Agile software methodologies scared the hell out of us. Suddenly, we had to find ways how to build software so that we could keep up with the high rate of change, just-in-time requirements and a sacrificial offering – a product increment – every two weeks (our Sprint length).
The way we were used to build software was not up to this task. We were used to dig a big hole of new functionality and to build something great over months. The structure of our source code and our engineering practices were no good to match the Agile monster.
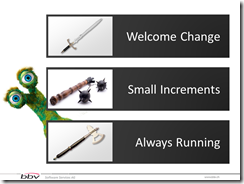
So we had to come up with some new “weapons” to stand a chance:
First, we needed to learn that changes are great – even late in the project lifetime. This allowed us to learn a lot about the problem we had to solve, before we had to decide how we would solve it. This led to much simpler solutions.
Second, we began to write our code in small increments – feature by feature. We could then show new functionality every Sprint to our customer. This help a lot in building software that really matches the problems it is intended to solve.
Third, we had to make sure that our software was always running. Otherwise, the risk was to big that we wouldn’t be able to show anything at the end of the Sprint.
On our quest to live happily ever after with the Agile monster, we found that there is one single principle regarding software design that rules all others:
Changing requirements, refactoring and technology upgrades lead to changes in source code. If these changes can be kept local in a single class, component or at least in a layer then we are able to accept them even late in the project, incorporate them in small increments and still have a running system.
Once we knew what to do, we had to find ways how to do it.
This is the agenda for the rest of the presentation.
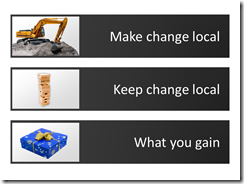
I’ll show you how we design software so that change will be local.
How we ensure that this still holds while we add additional features or change features because of changing requirements.
And finally, what we gain from building our software the Agile way.
The following six principles help to make change local.
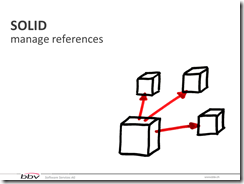
SOLID (Robert C. Martin http://butunclebob.com/ArticleS.UncleBob.PrinciplesOfOod) is a set of five principles how to design software:
- Single responsibility principle
- Open-close principle
- Liskov substitution principle
- Interface segregation principle
- Dependency inversion principle
I you follow these principles then you will design your classes and how they reference each other in a way so that changes will touch only little of them.
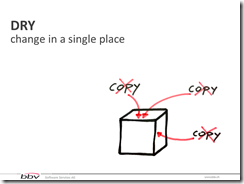
In code that follows the principle DRY (Don’t Repeat Yourself) there are no copies of code blocks doing the same. Therefore, if we have to change the way our code works, we have to change it in a single place. We don’t have to make the same change over and over again across the whole project.
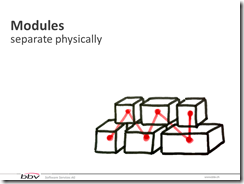
When we structure our system as a set of modules with explicit interfaces between them, we gain the possibility to replace a module without any impact on the other modules.
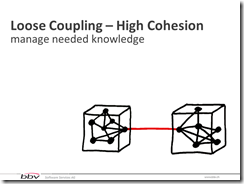
To keep change local, we seek one of to extremes when structuring functionality in our code. We want to know as little as possible about our environment (the classes and components surrounding us), and as much as possible about our direct friends helping us doing what we do.
The first is known as loose coupling, the second as high cohesion.
Loose coupling brakes unnecessary tight bonds between classes or components that are responsible for different functionality. Changing one functionality has only a minimal or no impact on others.
High cohesion packs methods or classes needed for a single functionality tightly together. This minimizes complexity and leads to better understandable designs. Which can more easily be changed.
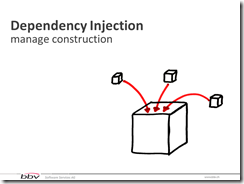
Most classes in our software just need some services to get their work done. How these services work internally is simply not interesting. Therefore, we should isolate the knowledge about what is to be put together from the real functionality.
Using dependency injection, we minimize knowledge about dependencies between classes and therefore we can keep changes local as we did with loose coupling.
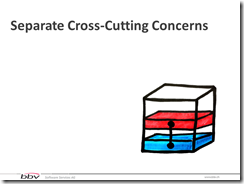
In our software there are almost always aspects the show up throughout many functionalities: logging, security, INotifyPropertyChanged implementations (.Net).
The better we can separate these cross-cutting concerns from the “real” functionality the better change can be kept local.
Once we wrote our code so that it can be changed locally, …
… we have to keep it that way when we refactor or change functionality due to changed business requirements.
When we change or refactor our code in the little – on the class level – then unit tests provide us the bounds to keep change local.
For example, if you change a line of code, the unit tests for the class holding the changed line will tell you immediately whether your change is local – inside the class – or will affect other classes. In the first case, the unit tests will still pass successfully. In the latter case, at least one unit test will fail.
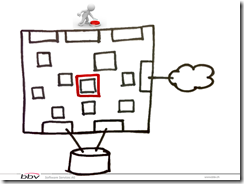
Let’s take a look at a typical system …
… where a user can push some buttons (top), external services can be queried (right) and data is stored in a database (bottom). As long as the unit tests of a class keep passing (red), the change is kept inside the red box. We can make big changes by changing class by class and adapt their unit tests step by step.
However, not all changes to code can be made by simply change code class by class and unit test per unit test. Bigger changes to functionality often result in complete classes being newly created or removed.
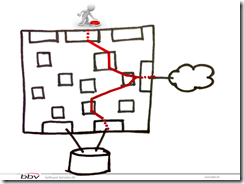
Acceptance tests will provide us the information whether such a change did affect another functionality we didn’t intend to change.
An acceptance test checks a complete scenario throughout the whole system. Therefore, if we want to change one scenario, all others should remain functional. Thus their associated acceptance tests still need to pass. Otherwise, the change was not local to the feature to be changed.
Okay, we design our code to keep change local. We introduced unit and acceptance tests to keep change local. Now what?
The suite of unit and acceptance tests guarantee us that our system is always working. There may still be some defects but on the whole the system is functional. Therefore, we know whether our architecture and design is practical and fulfills our needs.
Always transition our software from one working state to the next allows us to …
… evolve our architecture incrementally step by step. If a design decision results in a lot of tests failing, we can take a step backwards and try again – from a consistent working state.
This way, we can react to changing requirements – resulting in another architecture or design – throughout the whole project life cycle. And we can always walk forward without having to look back because our tests will prevent us from braking existing functionality.
So what are you waiting for? Design your code the Agile way!







Great reading. Good recap and nice introduction in agile for people that aren’t doing it yet.
And it looks like you have a good company to work for. Is it hiring? 🙂
@Valeriu Caraulean Thanks. And yes, bbv is hiring. See my email to you.
[…] Diseño Ágil […]
[…] Diseño ÁgilCodificación […]