
For a project I have to learn some of the specialty of an iScsi NAS. To be precise it was Net App FAS 2500 Filer. These things are very nice but a little too expensive for my personal use. But Net App offers a nice simulator of their product and the simulator is free. You just need to create an account on the Net App web site and search for the word ”simulator” or just follow this link. (http://now.netapp.com/NOW/cgi-bin/simulator). Some bloody side note: the website doesn’t work fine with safari. Just use Firefox and all works well in this case.
The other prerequirement you need is a Linux OS. I don’t want install some bloody Linux on my iMac, so I use VMware Fusion and the problem is solved. I use in this tutorial the Ubuntu 8.04 LTS Server. You might be considering now why I choose Ubuntu, the simple answer is I don’t known. Normally I use Open SUSE from Novell, but in this case I really don’t know. Strange things happen some times. Another side note I will guide you trough the installation so don’t panic if you are not an unix geek. But actually as non console junkie you should consider not to buy an EMC / IBM / … NAS ☺
Create a VMware with the normal settings 1 CPU, 10 GB HD, Nat NIC and 512MB Ram. Attach the OS iso and boot the whole batch job. Using the default settings is a nice strategy for not so experienced user. I only changed the keyboard layout to “swiss german (mac)” and check in the screen “install additional software” “ssh server” file transfer will be easy. Create an user called “geek” Then after next, next, …., next, next. The server has finished the miraculous installation. As a windows administrator the first thing I have done is enter in the console
Sudo reboot
After the restart I want to log in as root user, but the install wizard doesn’t accept the root password. After some time I decided to log in as user “geek”. Because it is only a testing environment I decided to enable root login in the console
sudo passwd root
After setting the password i started a console session on my mac shell and connected with ssh. You don’t need to do this but with an ssh session you are able to use Copy and Past with the host OS. For the poor windows user putty is a nice ssh tool. The Mac and Linux user just need to enter the following commands in the console
ssh <ip of the VM> -i root
the next thing you need to do is copying the download from the net app side “7.3.1-tarfile-v22.tar” to the VM server. I use “Cyberduck”. For windows users a nice program is winscp. The Linux guys should use the mighty shell console. By the way I createt a folder named “/netapp”. So let us open the tar file
tar xvf /netapp/7.3.1-tarfile-v22.tgz
In the readme form net app gives us a hint that the simulator uses perl. To install perl on your machine use “apt-get install perl”, actually pearl was installed so you don’t need to do it. Okay now we are ready to start installing the simulator. The strangest thing on this point was I didn’t have to deal with any problems, all worked just fine. This is a bad sign.
cd /netapp/simulator
./setup.sh
and the installation starts. Some logs from the console behind
Script version 22 (18/Sep/2007)
Where to install to? [/sim]:
Would you like to install as a cluster? [no]:
Would you like full HTML/PDF FilerView documentation to be installed [yes]:
Continue with installation? [no]: yes
Creating /sim
Unpacking sim.tgz to /sim
Configured the simulators mac address to be [00:50:56:0:6c:5]
Please ensure the simulator is not running.
Your simulator has 3 disk(s). How many more would you like to add? [0]: 10
The following disk types are available in MB:
Real (Usable)
a - 43 ( 14)
b - 62 ( 30)
c - 78 ( 45)
d - 129 ( 90)
e - 535 (450)
f – 1024 (900)
If you are unsure choose the default option a
What disk size would you like to use? [a]:
Disk adapter to put disks on? [0]:
Use DHCP on first boot? [yes]:
Ask for floppy boot? [no]:
Checking the default route…
You have a single network interface called eth0 (default route) . You will not be able to access the simulator from this Linux host. If this interface is marked DOWN in ifconfig then your simulator will crash.
Which network interface should the simulator use? [default]:
Your system has 455MB of free memory. The smallest simulator memory you should choose is 110MB. The maximum simulator memory is 415MB.
The recommended memory is 512MB.
Your original default appears to be too high. Seriously consider adjusting to below the maximum amount of 415MB.
How much memory would you like the simulator to use? [512]:
Create a new log for each session? [no]:
Overwrite the single log each time? [yes]:
Adding 10 additional disk(s).
Complete. Run /sim/runsim.sh to start the simulator.
Wow this was very easy. Nice Job Net App. In the last row there is the hint how to start the simulator so lets go.
/sim/runsim.sh
Peng, Klaap, kabumm, doing and an error appears on the console “Error ./maytag.L: No such file or directory”. F.. after some time, maybe 4 hours reading logs, traying these and that, and drinking some coffee I figured out that I need to install some libraries for AMD 64. This sounds funny but it solved my problem. This was the penalty for the easy setup.
apt-get install ia32-libs
and again try to startup. I deleted some info rows from the console log. But all questions should be present in the log below.
root@netapp:/netapp/simulator# /sim/runsim.sh
runsim.sh script version Script version 22 (18/Sep/2007)
This session is logged in /sim/sessionlogs/log
NetApp Release 7.3.1: Thu Jan 8 00:10:49 PST 2009
Copyright (c) 1992-2008 NetApp.
….
….
….
Do you want to enable IPv6? [n]: n
Do you want to configure virtual network interfaces? [n]:
Please enter the IP address for Network Interface ns0 [172.16.111.136]:
Please enter the netmask for Network Interface ns0 [255.255.255.0]:
Please enter media type for ns0 {100tx-fd, auto} [auto]:
Please enter the IP address for Network Interface ns1 []:
Would you like to continue setup through the web interface? [n]:
Please enter the name or IP address of the IPv4 default gateway [172.16.111.2]:
The administration host is given root access to the filer’s
/etc files for system administration. To allow /etc root access
to all NFS clients enter RETURN below.
Please enter the name or IP address of the administration host:
Please enter timezone [GMT]:
Where is the filer located? []:
What language will be used for multi-protocol files (Type ? for list)?:
language not set
Do you want to run DNS resolver? [n]:
Do you want to run NIS client? [n]: Setting the administrative (root) password for mynetapp …
New password:
Retype new password:
Mon May 4 20:31:11 GMT [passwd.changed:info]: passwd for user ‘root’ changed.
….
….
….
This process will enable CIFS access to the filer from a Windows(R) system.
Use "?" for help at any prompt and Ctrl-C to exit without committing changes.
Your filer is currently visible to all systems using WINS. The WINS
name server currently configured is: [ 172.16.111.2 ].
(1) Keep the current WINS configuration
(2) Change the current WINS name server address(es)
(3) Disable WINS
Selection (1-3)? [1]:
A filer can be configured for multiprotocol access, or as an NTFS-only
filer. Since multiple protocols are currently licensed on this filer,
we recommend that you configure this filer as a multiprotocol filer
(1) Multiprotocol filer
(2) NTFS-only filer
Selection (1-2)? [1]:
CIFS requires local /etc/passwd and /etc/group files and default files
will be created. The default passwd file contains entries for ‘root’,
‘pcuser’, and ‘nobody’.
Enter the password for the root user []:
Retype the password:
The default name for this CIFS server is ‘MYNETAPP’.
Would you like to change this name? [n]:
Data ONTAP CIFS services support four styles of user authentication.
Choose the one from the list below that best suits your situation.
(1) Active Directory domain authentication (Active Directory domains only)
(2) Windows NT 4 domain authentication (Windows NT or Active Directory domains)
(3) Windows Workgroup authentication using the filer’s local user accounts
(4) /etc/passwd and/or NIS/LDAP authentication
Selection (1-4)? [1]: 4
What is the name of the Workgroup? [WORKGROUP]:
CIFS – Starting SMB protocol…
Welcome to the WORKGROUP Windows(R) workgroup
CIFS local server is running.
Password:
mynetapp> Mon May 4 20:32:25 GMT [console_login_mgr:info]: root logged in from console
Mon May 4 20:32:31 GMT [nbt.nbns.registrationComplete:info]: NBT: All CIFS name registrations have completed for the local server.
mynetapp>
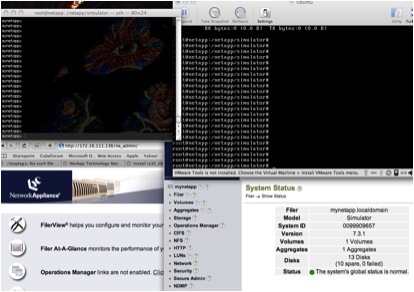
SO this was not so hard. Now enjoy the world class filer in your VMware
Hi,
I installed DataOntap 8.1 and I want to switch in French keyboard.
Can you explain how you have switch german keyboard.
Best regards
Hi Monpelaud
Hmm sorry i have no idea how to change the keyboard in 8.1. but when you connect to the toster with ssh or telnet, you have the keyboard layout of your host system.
cheers Konrad